Cosmicrafts
Weekly Developer Update #36
Weekly Developer Update #36
Your guide to Cosmicrafts Reforged
Hello Commander, and welcome to another Weekly Developer Update! This time, we’re thrilled to walk you through how to get started with the latest version of Cosmicrafts.
We’ve made a lot of changes, focusing on the economy and user experience to bring you a fully on-chain experience. Strap in and get ready to embark on an epic journey through the cosmos!
So let’s dive in!
Step 1: Downloading the Game
The first step on your journey is to download Cosmicrafts. Visit our website to find the version that’s right for your operating system. Currently, we support Windows, Mac, and Linux.
https://cosmicrafts.com/
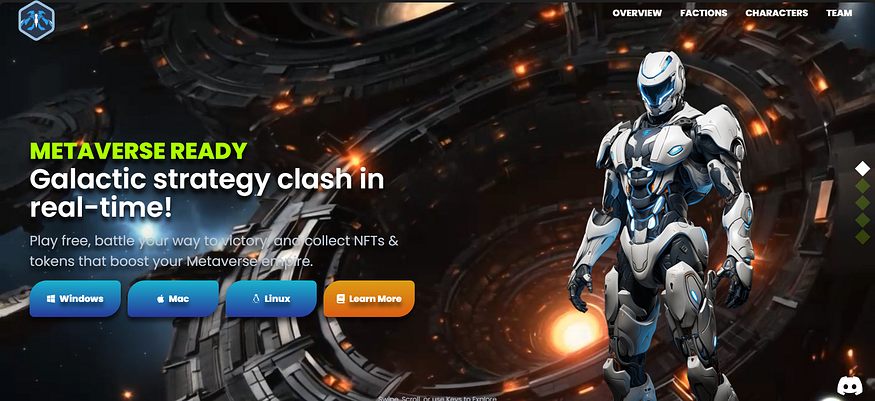
- Windows Users: Download the installer and follow the simple steps to install Cosmicrafts on your system.
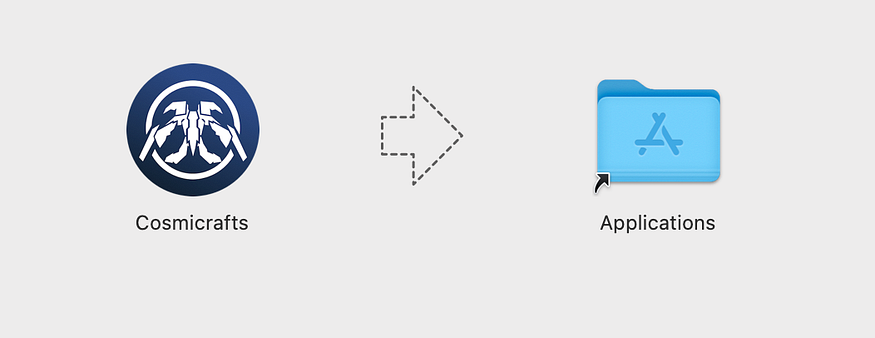
- Mac Users: Download the game and drag it into your Applications folder. It’s as easy as that!
- Linux Users: Download the game and give it execute permissions. Since we know you’re a seasoned Linux user, you’ll know exactly what to do (or just go at the end of this blog for additional troubleshooting).
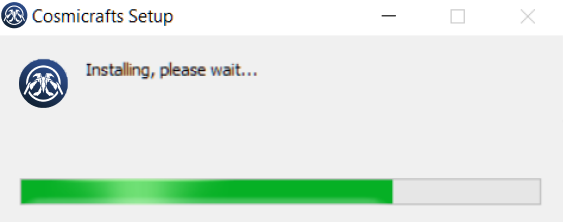
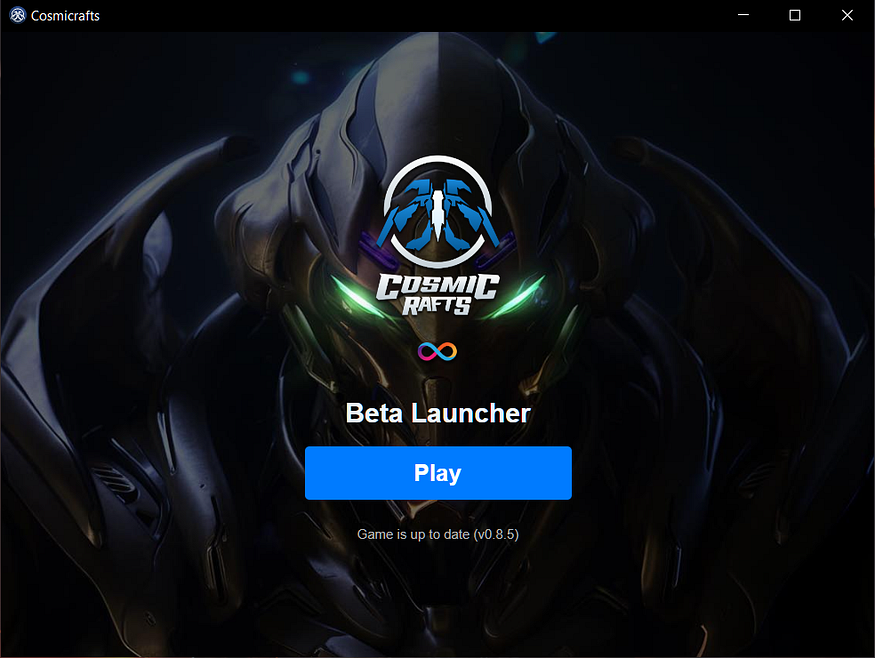
Cosmicrafts comes with a self-updating launcher
You’ll always have the latest version. The launcher will automatically check for updates and install them, so you’re always ready to dive into the action with the newest features and improvements.
Step 2: Creating Your Account
Now that you’ve launched Cosmicrafts, the next step is to create your account. We’ve provided multiple options to ensure you can choose the one that suits you best:
- Web Login
- Wallet Login
- Guest Login
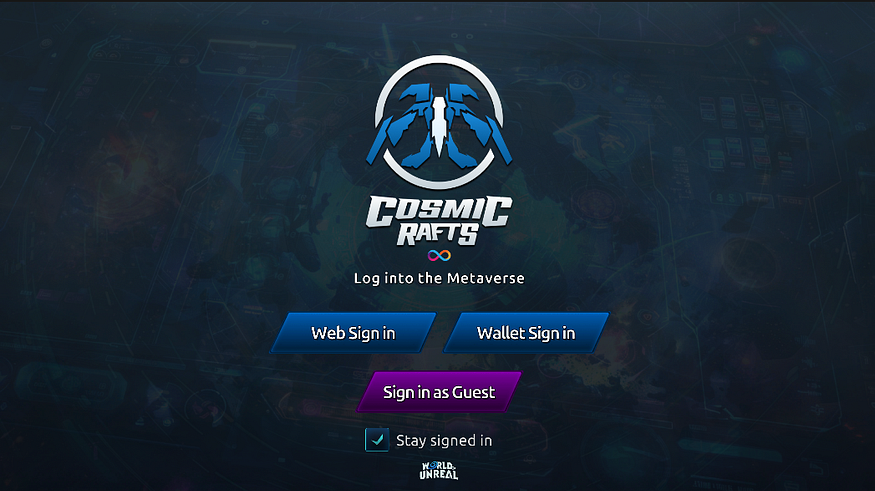
Let’s walk through each option so you can decide which one is right for you.
Web Login
With Web Login, you can easily log in using your preferred wallet. For ICP Native wallets, we currently support:
- NFID
- Internet Identity
(And don’t worry, Plug Wallet integration is coming soon!)
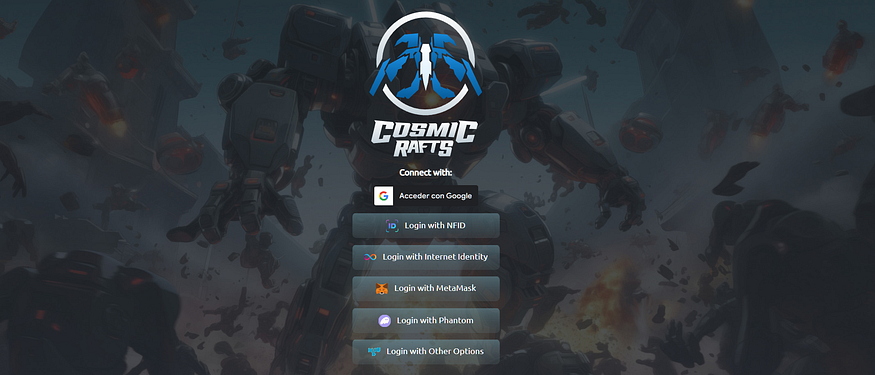
We’ve also integrated popular wallets from other chains, like Metamask and Phantom. If you’re a Web2 user, you can log in with your Google account with just one click. Additionally, you have the option to log in using your Facebook, Github, or Microsoft account.
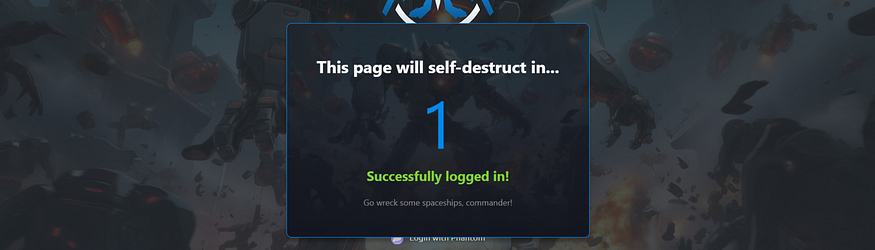
Once logged in, the browser tab will close automatically in 5 seconds, and you’ll be ready to start your adventure!
Wallet Login
If you’re familiar with seed phrases, Wallet Login is a great option. Here’s how it works:
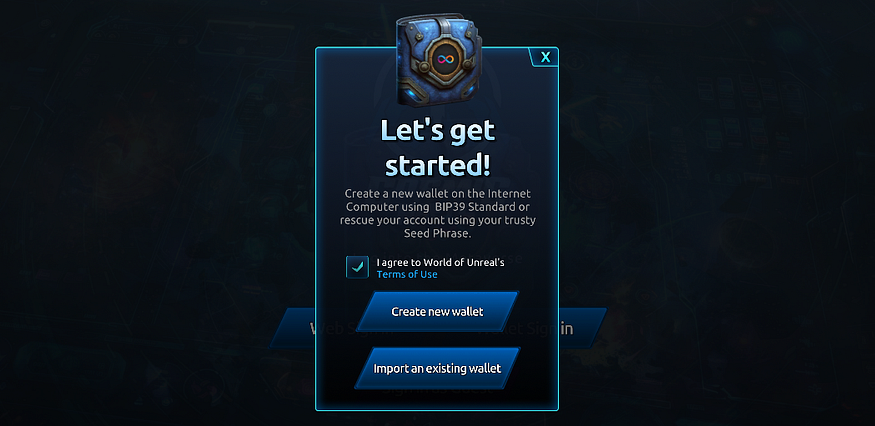
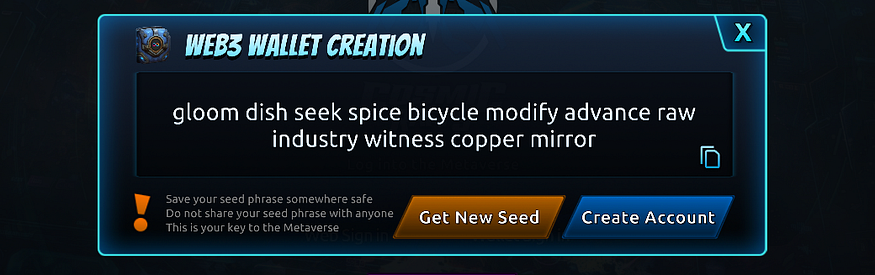
- Create a New Wallet: Using the secure BIP-39 standard, generate a seed phrase that will create your keys and principal ID on the Internet Computer. Make sure to store this seed phrase safely, though you can recover it later in the options menu.
- Import an Existing Wallet: If you already have a seed phrase, you can use it to recover your account. Note that importing a seed from Plug, Stoic, or dfx will not produce the same principal ID.
Guest Login
Guest Login is the simplest and most straightforward option. With just one click, you can create your identity on the Internet Computer. You can later recover your seed account in the options menu if needed.
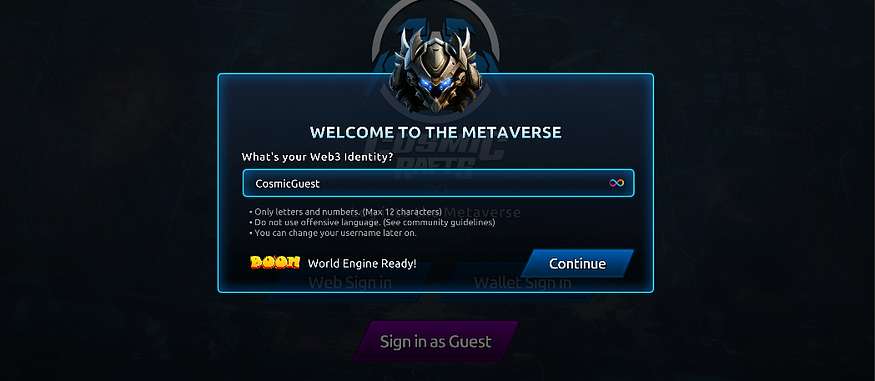
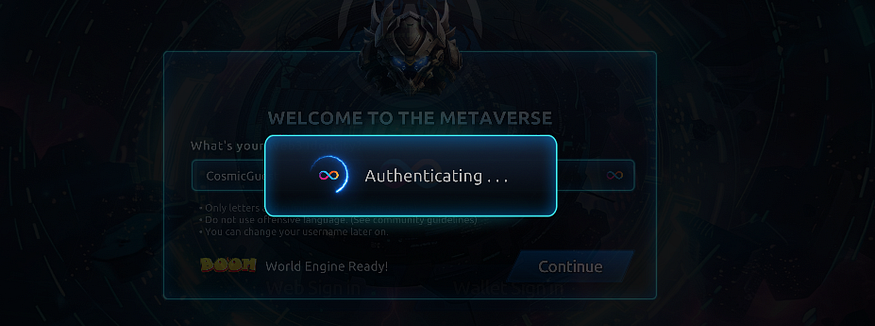
Step 3: Choosing Your Username and Minting Your First NFTs
First-time users will need to choose a username to create their account. Once you’ve selected your username, we’ll mint 8 free Spaceship NFTs (Level 1) to get you started. So hold on for a few seconds on your first login.
These game NFTs are essential for playing Cosmicrafts, providing you with the initial fleet you need to dive into the action.
Step 4: Navigating the Main Interface
Welcome to the main interface, your command center. Here, you can manage everything before heading into intergalactic warfare. Let’s take a look at the main sections.
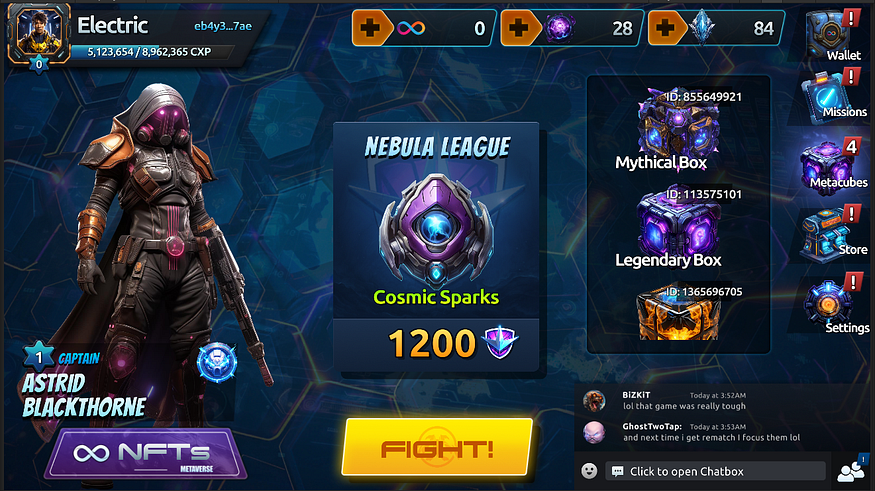
NFTs
Click on the hero or NFT button to access your NFT panel. This panel is divided into two sections:
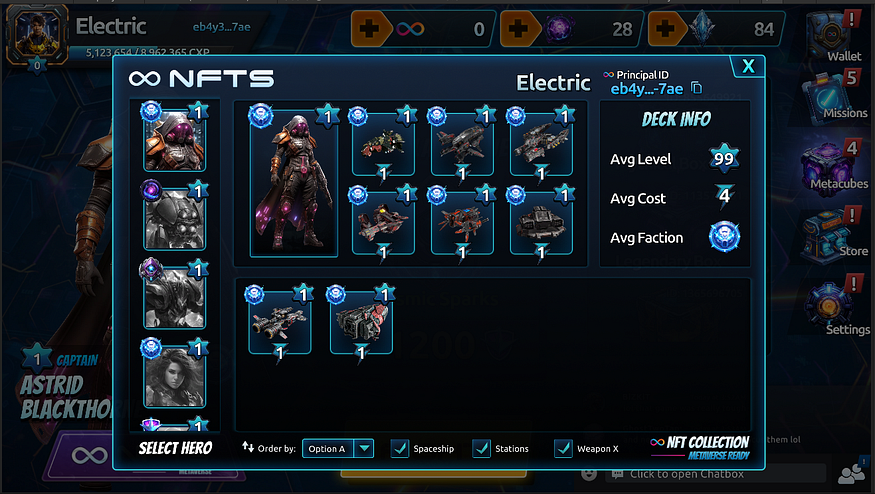
- NFT Collection: Located at the bottom, this section displays all the NFTs your Internet Computer account (principal ID) holds.
- NFT Deck: Positioned at the top, this section shows the units you’ll take to the battleground. Currently, you can choose up to 6 units. Choose wisely to match your strategy, and look forward to more NFTs being added in future updates for even greater variety.
Note: The hero commander selection on the left side is not available now but will be reintroduced in future updates as we integrate back Heroes.
Unit Viewer
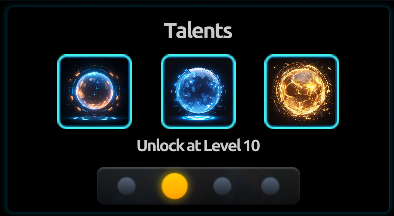
To check the properties of each NFT, simply click on it. A new panel will appear, showcasing:
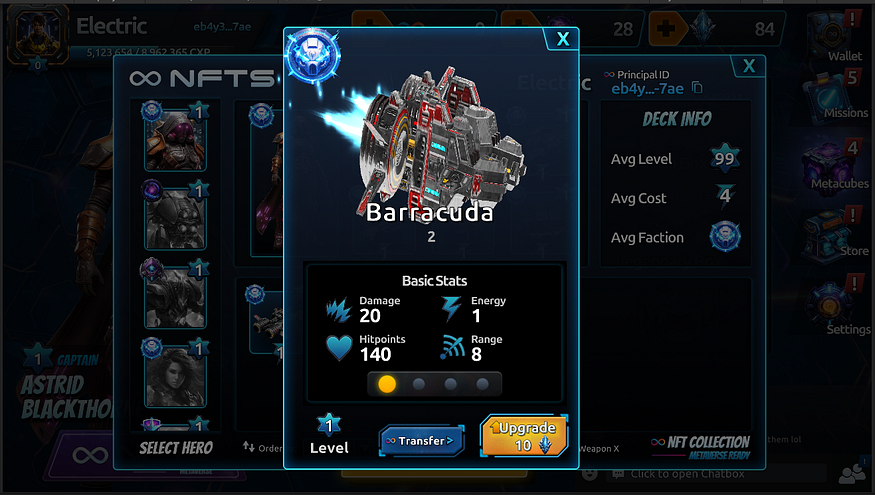
- NFT Metadata: View basic stats, skins, and talents (coming in future updates).
- Blockchain Info: Access detailed blockchain information.
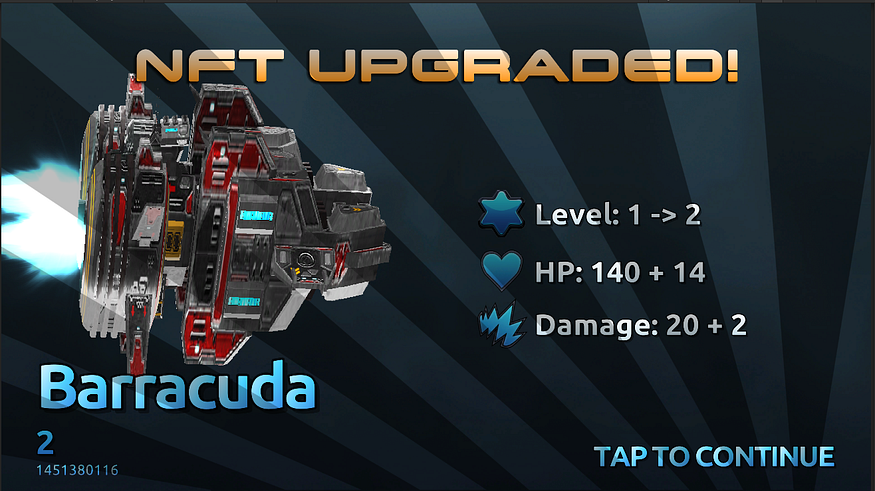
- Transfer Function: Transfer your NFTs to another Internet Computer account via Principal ID.
- Upgrade Function: Upgrade your NFTs using Shard Tokens. Higher levels mean more powerful stats but also higher token costs.

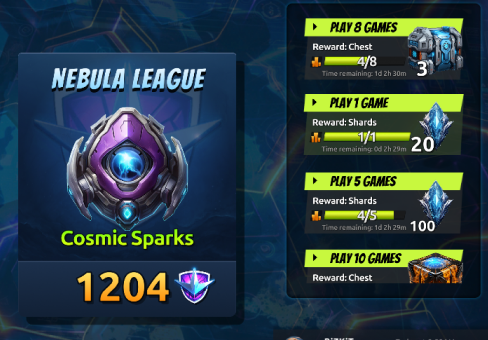
Missions and Rewards (Play2Earn)
Click on the Missions Tab to view the current missions available. Each mission offers unique rewards ranging from tokens to lootboxes of varying rarities.
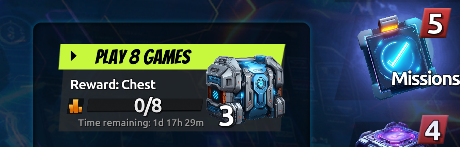
Make sure to complete these missions before they expire, as new missions will be added daily and weekly.
Completing missions is an excellent way to earn tokens and upgrade your NFTs, giving you a strategic advantage on the battlefield.
Metacubes
Metacubes are special NFTs in the form of lootboxes. You can transfer them to another Internet Computer account via Principal ID, collect them, or open them to receive their contents as rewards.
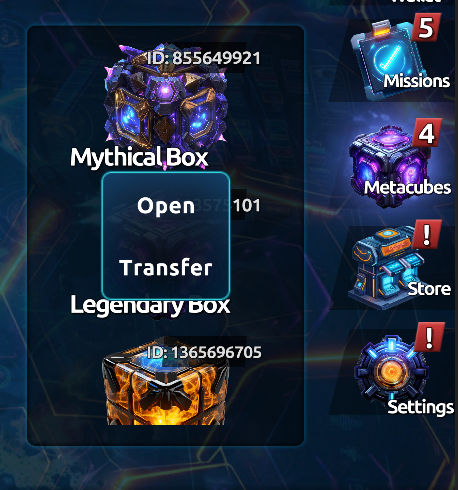
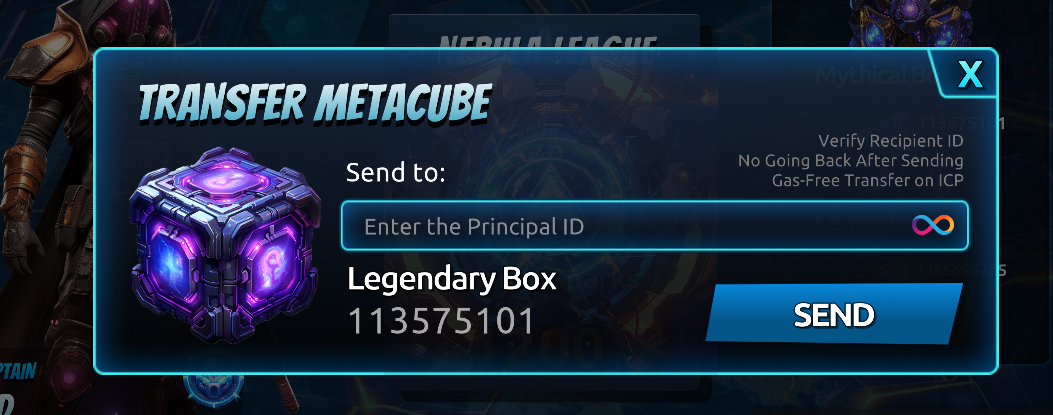
The rarity of the Metacube, indicated in its metadata, determines the amount and value of the rewards. Higher rarity Metacubes offer more valuable tokens.
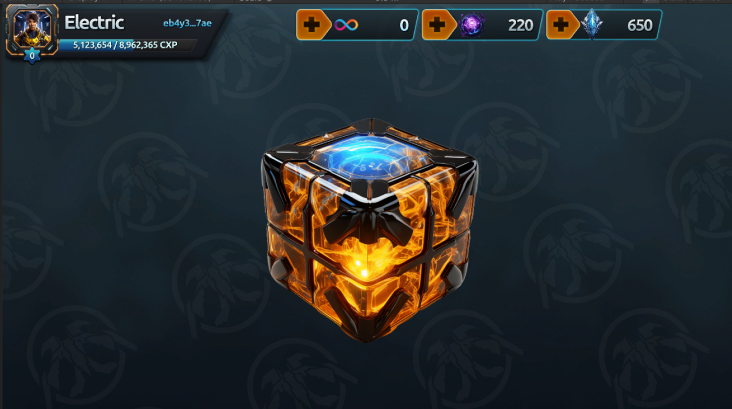
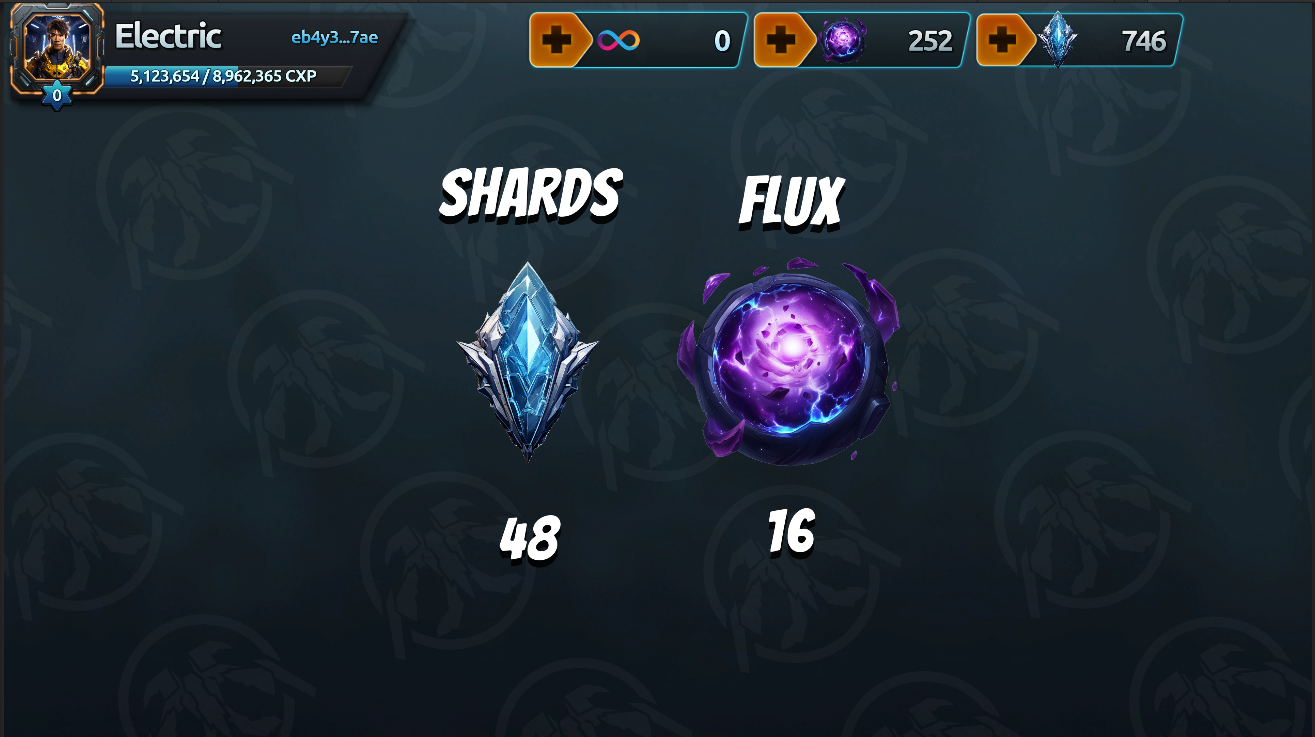
You can obtain Shards and Flux tokens from Metacubes.
Player Profile
Your Player Profile is where you can check your personal progress. Here, you’ll find an overview of your account, basic gameplay statistics, and the avatar section where you can change your avatar.
![]()
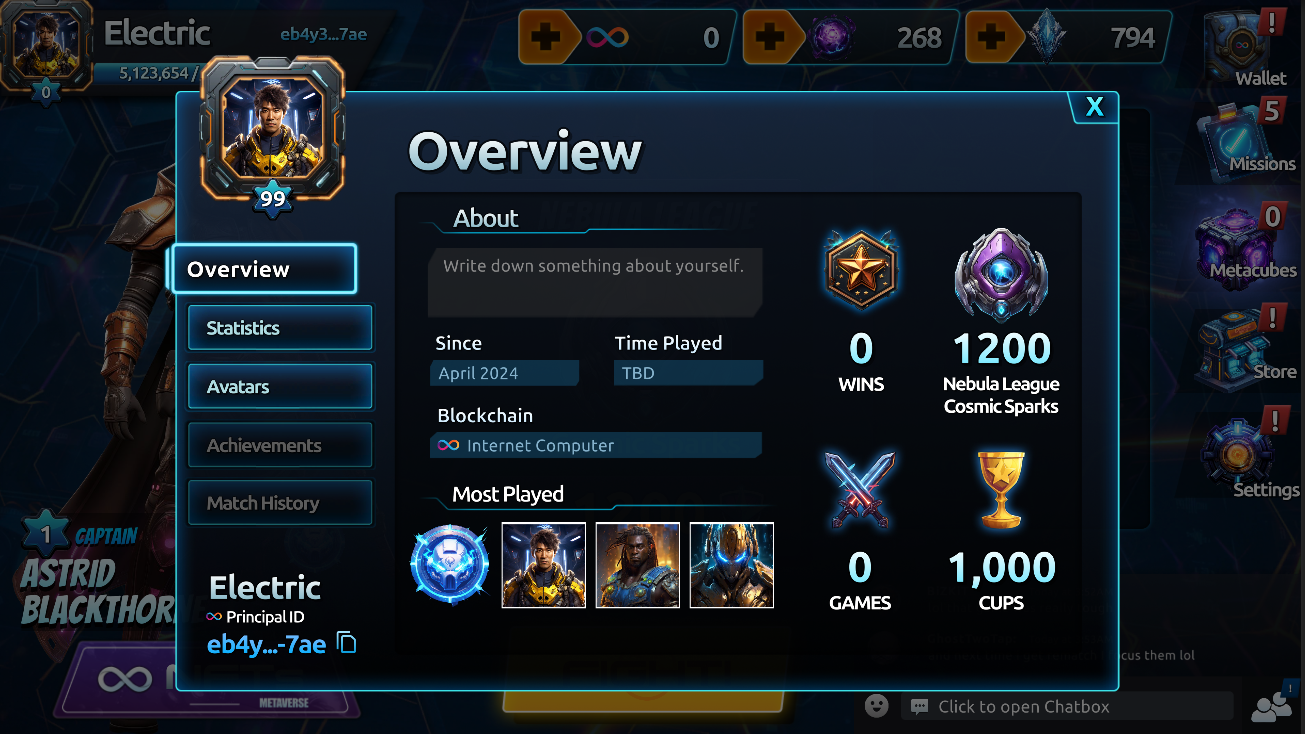
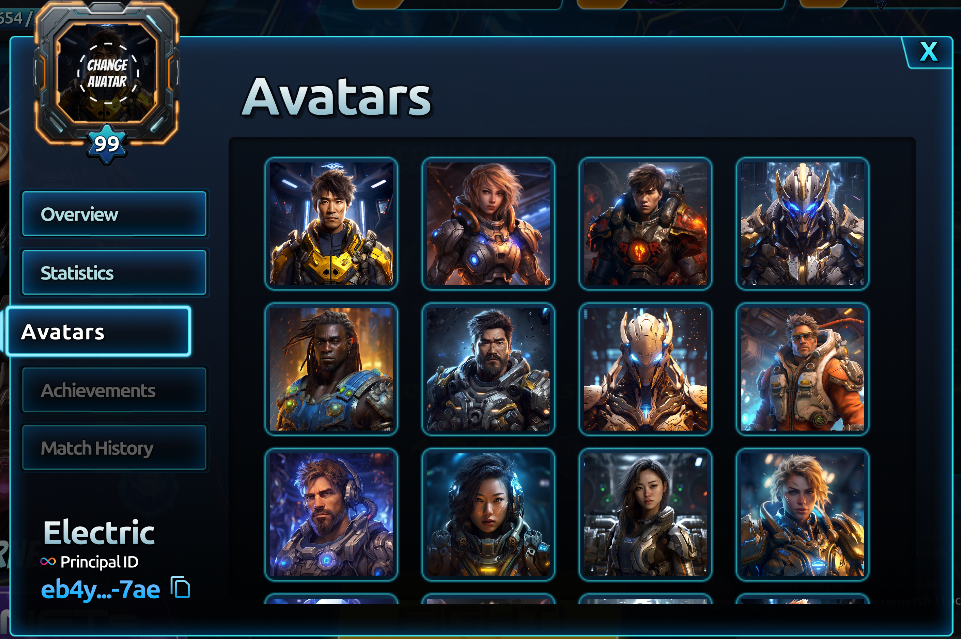
This area helps you keep track of your achievements and personalize your in-game identity.
Transfer Tokens
Clicking on the token panels at the top of the screen will open another panel that allows you to send tokens to another principal ID.

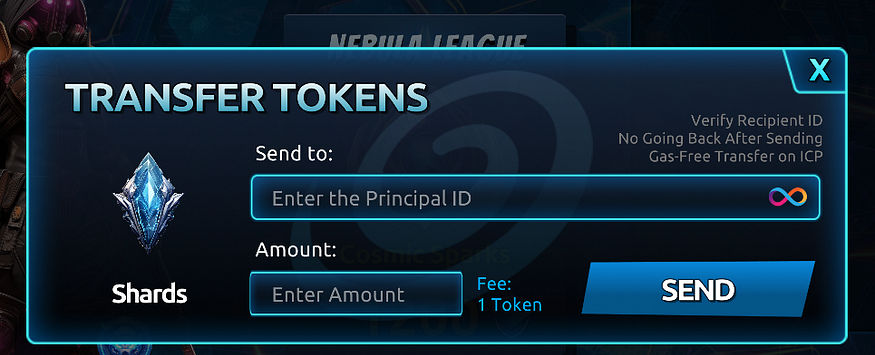
This feature makes it easy to manage and transfer your in-game currency to other players or accounts.
Future Features
You might notice some features on the main menu that are not yet available. We’re actively working on these and will be introducing them in future updates. These features include:
- Developed Wallet: A more advanced wallet to check other tokens.
- Store: A store where you can buy assets and bundles.
- Social Features: Including a friends list, chat, and guilds to connect and collaborate with other players.
- BOOM Gaming Guilds: We’re integrating Quests into the Boom DAO Leaderboards.
Step 5: Jumping into Battle
Now that you’re familiar with navigating the main interface, it’s time to hit that play button and get matched with another player. Here’s what you need to know to dominate the battlefield.

Getting Started
When you press the play button, you’ll be matched with another player. The game mechanics are straightforward yet strategic, ensuring every battle is both exciting and challenging.
Deploying Your Fleet
Drag and drop your spaceships into your spawning zone. This is the area outside the red boundary, which marks your enemy’s zone. Position your units strategically to maximize their effectiveness and counter your opponent’s moves.
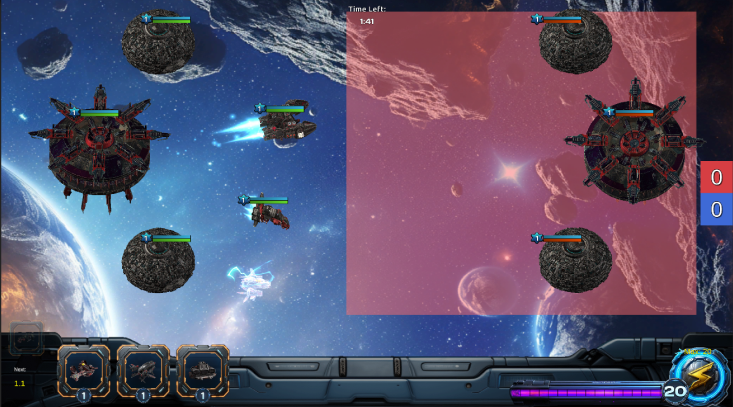
The Objective
Your mission is to destroy the enemy base. Use your fleet’s unique abilities and strengths to break through your opponent’s defenses. Outmaneuver, outsmart, and overpower your enemy to secure victory.
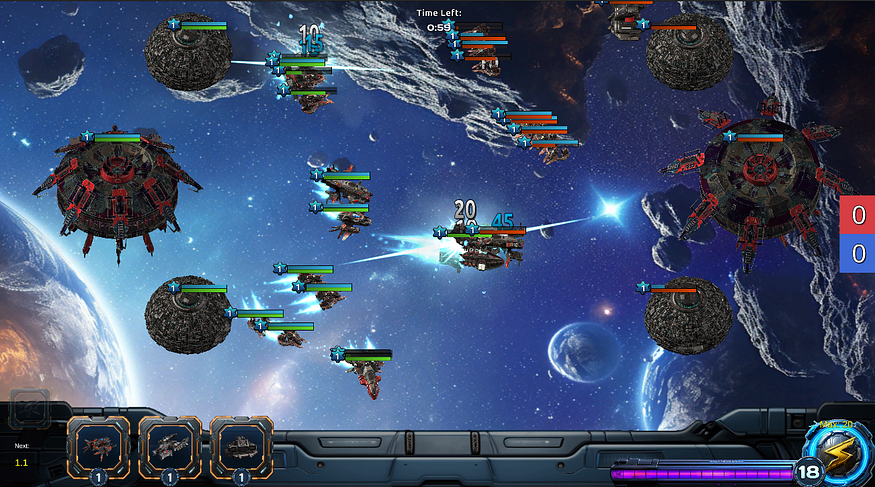
Battle Tips
- Strategic Placement: Think carefully about where you place each unit. Consider their strengths and weaknesses, and position them to create a balanced and effective attack.
- Resource Management: Keep an eye on your energy and use itwisely. Deploying units at the right moment can turn the tide of battle in your favor.
- Adapt and Overcome: Be prepared to adapt your strategy based on your opponent’s moves. Flexibility and quick thinking are key to victory.
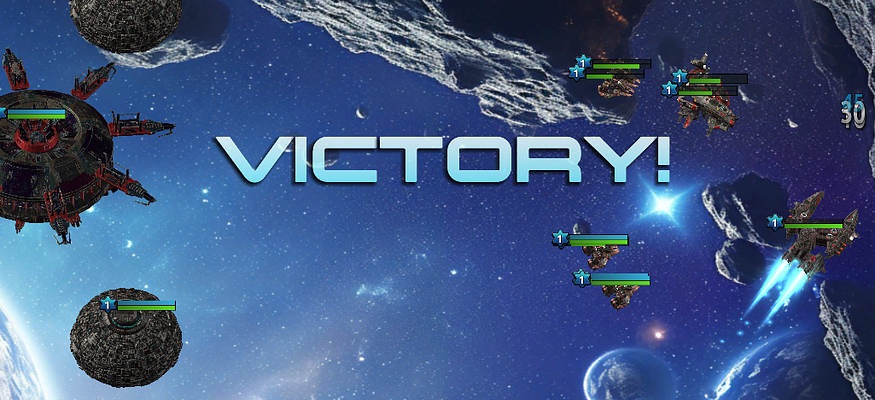
Victory Awaits
Don’t forget to claim your rewards from the Missions tab.
So, Commander, are you ready to prove your skills on the battlefield?
Wrapping Up
We hope this guide helps you navigate and enjoy the latest version of Cosmicrafts Reforged. As always, your feedback is invaluable to us. Let us know which features you’re most excited about and what you’d like to see in future updates. Your input helps us shape the game to better meet your expectations and create an even more engaging experience.
That’s it for this comprehensive guide.
See you on the Cosmic Battlegrounds.
oh wait, wait…
Additional Linux troubleshooting
Alright, we also know Linux is not that easy when you don’t have years of experience, but let’s guide you through how to do this.

AppImages require FUSE to run
Depending on your distro you might need to install the FUSE libraries
on Ubuntu/Debian
sudo apt install fuse
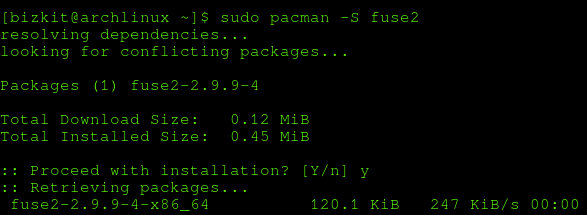
On Archlinux / Manjaro / Endeavour
sudo pacman -S fuse2
On Fedora
sudo dnf install fuse
On OpenSuSe
sudo zypper install fuse
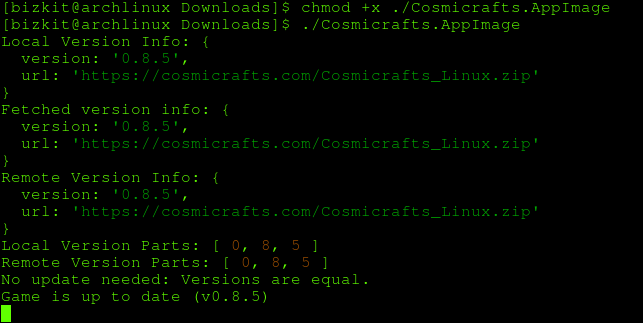
Give Execute Permissions to the AppImage
To give execute permissions to your AppImage file, use the following command:
chmod +x ./Cosmicrafts.AppImage
After setting the permissions, you can double click to execute or run your AppImage on the terminal:
./Cosmicrafts.AppImage
Leave a comment
Log in with itch.io to leave a comment.